
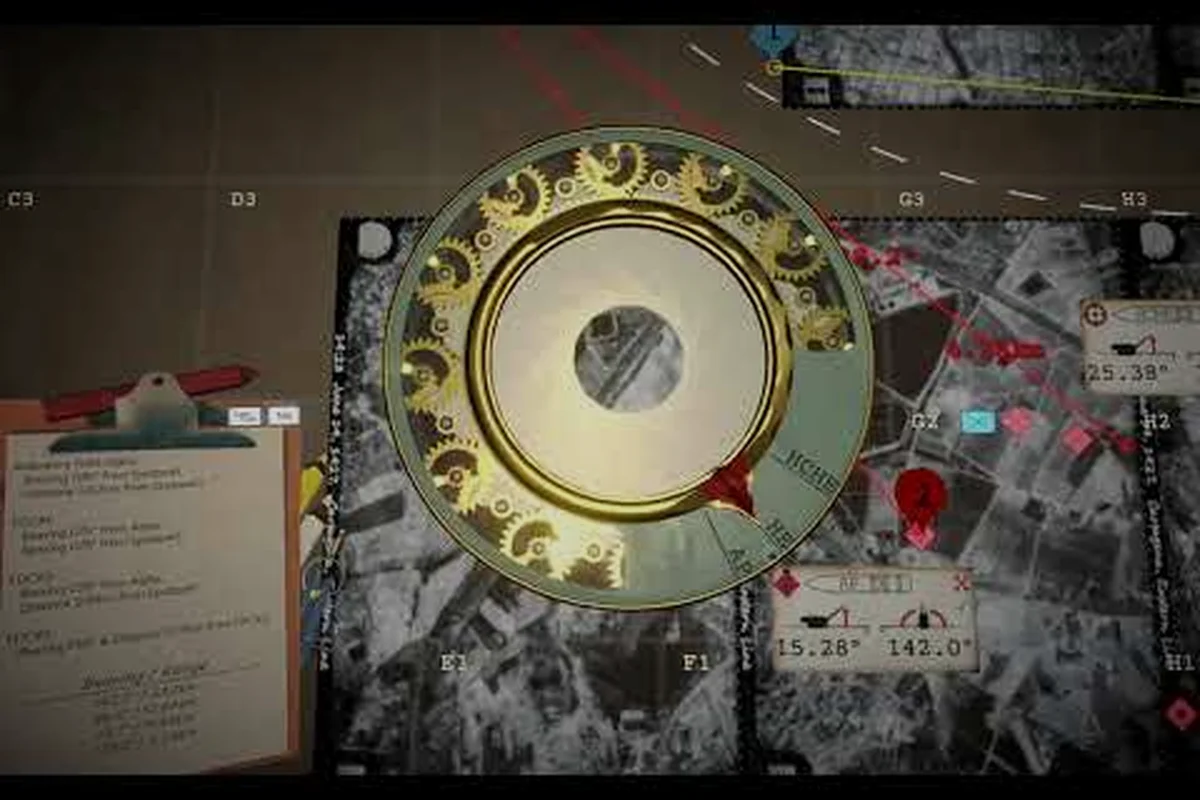
Speed Challenge runs in IRON NEST: Heavy Turret Simulator strip the campaign down to a stopwatch problem, because every wasted second between the teleprinter chirp and the first muzzle flash costs a leaderboard rank. The speed fire mission format rewards crews who can compress the full six-step firing loop—intelligence, plot, calculate, load, aim, fire—into the minimum number of in-game seconds while still landing a confirmed hit. This guide collects the timing data, charge shortcuts, and calculator drills that push a competent operator into the upper brackets of every Iron Nest speed challenge tier, so you walk away from the table knowing exactly where your seconds are bleeding.
Speed Fire Mission Overview — What Operators Face
A speed fire mission is a self-contained scoring run built on top of the same ballistic pipeline the campaign teaches, but stripped of any moral-choice downtime or scenic travel. The mission briefing drops onto the teleprinter with a single set of target coordinates, a powder charge ceiling, and a recommended shell family, then the clock starts the instant you reach for the telegraph key. Every region of the Spanish Front ships its own speed variant, which means a strong run on the Asturias ridge is not automatically transferable to the Córdoba corridor if you have not internalized the regional elevation profiles.
-
Optimal loadout varies between speed-focused and accuracy-focused builds
-
Medal thresholds unlock at bronze, silver, and gold score tiers
-
Each challenge mode locks specific inputs such as time or charge limits
-
Speed Fire Mission rewards the fastest complete fire solution cycle
-
Batch Targeting Challenge scores multi-target engagement efficiency
-
FDC Pause Challenge penalizes unnecessary fire-direction pauses
-
Leaderboards are per-mode, not global, rewarding specialization
-
Speed fire missions compress the standard firing loop from 90 seconds down to as little as 40 seconds per target
-
Pre-loading the next shell while the current round is in flight saves critical seconds in the speed fire cycle
-
The time-pressure coefficient in speed missions multiplies target value by up to 3.5× for targets destroyed in the first 60 seconds
The scoring formula rewards speed, but it also rewards cleanliness. Hits at the Optimal Spot Marker earn a multiplier that scales with how many seconds you shaved off the baseline time, while misses or near-misses dock points and extend the timer by a brief correction window before the next engagement is allowed to start. For most operators the practical ceiling is set by how quickly they can move from the calculator dials to the Loading Tray without fumbling a brass casing, because the time between solving a fire solution and chambering the round is where the average run either wins a medal or stalls out in Bronze tier.
| Challenge Tier | Baseline Time (sec) | Spot Marker Multiplier | Miss Penalty (sec) |
|---|---|---|---|
| Bronze | 120 | x1.0 | +8 |
| Silver | 95 | x1.4 | +10 |
| Gold | 75 | x2.0 | +12 |
| Ace | 55 | x3.0 | +15 |
The bronze-to-ace ladder rewards incremental mastery rather than raw twitch reflex, which is why the rest of this walkthrough is organized around the phases of the firing loop where the largest time savings are realistically available to a solo player.
Core Speed Loop Mechanics — From Telegraph to Trigger
The six-step shooting loop described in the ballistic calculator workflow is the same one a speed fire mission measures, so any improvement in your base campaign loop translates directly into leaderboard points. The challenge format simply removes the long lull between engagements and replaces it with a stopwatch, which makes it unforgiving about micro-pauses that the campaign never penalizes.
Telegraph Decode Phase
When the teleprinter starts clattering, the speed mission briefing is a compact five-field card rather than the dialogue-heavy intelligence brief used in the story regions. The fields you care about are target grid, recommended shell, charge ceiling, weather flag, and any correction note from the previous engagement. Because the FDC pause timing tactics run on the same briefing layout, drilling the speed mission also tightens your FDC pause economy.
The fastest crews read the briefing in a fixed visual order—grid first, shell second, charge ceiling third, weather last—so that the eye never drifts back to the top of the card mid-action. With that habit cemented, the decode phase compresses to roughly three seconds, which is the difference between a Bronze run and a Silver run on most regions.
Map Plot and Calculator Solve
Once the grid is in your head, the Tactical Map Table plotting step is where most operators leak their first five seconds. The draw-down is governed by two timing facts: how quickly you can locate the grid square on the printed sheet, and how quickly you can transcribe the range and bearing into the Ballistic Calculator without losing the weather flag. Plugging the elevation angle calibration into your mental model early makes the calculator dial travel far shorter because your fingers already know roughly where each ring will land.
The calculator itself supports a high-speed workflow if you commit to a fixed entry sequence. Range first, then bearing, then charge, then the wind correction knob, and finally the elevation handwheel to the calculated figure. Reverse the order and you spend an extra second chasing the dials back to zero between every parameter.
Loading and Gun Laying
The loading phase is the single biggest opportunity for fire mission timing improvement, because it is also the phase where the physical motion of the turret matters most. The hoist has a fixed cycle, the Powder Charge tray has a fixed grab order, and the brass casing has a fixed seating orientation; every wasted grip costs roughly half a second.
| Phase | Bronze Avg (sec) | Silver Avg (sec) | Gold Avg (sec) | Ace Avg (sec) |
|---|---|---|---|---|
| Telegraph decode | 4.5 | 3.0 | 2.0 | 1.5 |
| Map plot + calc | 14.0 | 10.5 | 7.5 | 5.0 |
| Load + traverse | 12.0 | 9.0 | 6.5 | 4.5 |
| Gun lay + fire | 6.0 | 4.5 | 3.0 | 2.0 |
| Spot + reset | 3.5 | 3.0 | 2.5 | 2.0 |
| Total | 40.0 | 30.0 | 21.5 | 15.0 |
These are the per-phase ceilings reported by competitive crews on the community leaderboards, and they line up with the multipliers in the tier table above when multiplied against the baseline times. Hitting each ceiling requires tightening every step in your reload-fire cycle by approximately one second, which compounds dramatically across a multi-hundred-point mission.
Charge Selection and Loading Optimization
Powder charge selection is the most underestimated lever inside a speed fire mission, because the campaign never punishes you for solving with a slightly higher charge than required. The challenge mode does, because every extra ring of elevation takes time on the handwheel and risks drifting past the Optimal Spot Marker. Treat the recommended charge as a hard ceiling rather than a starting point, and you will shave consistent seconds off the gun-lay phase.
| Charge # | Effective Range | Best Speed Mission Use | Loading Penalty vs Charge 3 |
|---|---|---|---|
| Charge 1 | Under 2 km | Coastal counter-battery only | -0.4 sec |
| Charge 2 | 2–4 km | Short Asturias ridge exchanges | -0.2 sec |
| Charge 3 | 4–7 km | Default Córdoba corridor runs | baseline |
| Charge 4 | 7–10 km | Long Sierra crossings | +0.3 sec |
| Charge 5 | 10–13 km | Mountain flanks at extreme range | +0.6 sec |
| Charge 6 | 13+ km | Rare artillery duel scenarios | +1.0 sec |
A useful rule of thumb is to refuse any charge that pushes you past the recommended ceiling, even when the calculator says it will technically solve, because the extra handwheel travel almost always costs more time than it saves in misses. Loading optimization also extends to which Powder Charge you grab from the tray first; memorizing the tray layout so the dominant hand never crosses the body is worth around half a second per cycle, and that single half-second is the difference between Gold and Silver on the trickier regions.
A second optimization is shell pre-staging. Speed missions pin you to a recommended shell family, so there is no reason to leave the wrong shell types cluttering the loading tray. Strip the tray to the recommended family before the clock starts, and the brass-casing grab becomes a one-motion reach rather than a visual search.
Speed Challenge Tier Strategies and Score Targets
Each tier of the Iron Nest speed challenge ladder rewards a different mix of raw speed and tactical restraint, which is why a single strategy does not carry you from Bronze to Ace. Treat the tier ladder as four separate problems and the run becomes far more predictable.
Bronze Tier Strategy
Bronze runs are forgiving enough that you can finish them on campaign muscle memory alone, and the goal here is to bank consistent completions rather than chase records. Use Bronze as your calculator drill: solve every fire solution with the same dial entry order, even on shots you could land by eye, because the muscle memory you build at Bronze is what pays off at Gold. Target a stable 110-second completion and let the Spot Marker multiplier carry you into Silver eligibility.
Silver Tier Strategy
Silver is where the charge ceiling starts to bite. The recommended charge is rarely optimal, so begin experimenting with down-charging to the lowest viable ring on each engagement. The Sierra crossings in particular reward a charge-two solution over the briefing's charge-three recommendation, because the elevation savings on the handwheel compound across the run. Target 85-second completions and start refusing any run that needs more than one correction shot per engagement, because correction time scales worse than initial solve time.
Gold Tier Strategy
Gold demands both the calculator discipline from Bronze and the charge frugality from Silver, then layers gun-lay precision on top. The community-reported gold ceiling sits near 70 seconds, which means every phase has to run near the Gold column of the phase breakdown table above. Most operators break into Gold by overpracticing the loading motion, because once the loading phase falls under seven seconds the rest of the run usually follows. The Iron Nest calibration fire guide is a useful side drill because it isolates the gun-lay phase from the briefing overhead.
Ace Tier Strategy
Ace runs are effectively a separate game mode because the baseline time of 55 seconds assumes you never read the briefing twice, never fumble a shell, and land the first shot inside the Spot Marker more than nine times out of ten. The honest path to Ace is to grind the regional leaderboards until the run becomes muscle memory, then trim the last two or three seconds by optimizing tray layout and dial entry order. Treat Ace as a long project rather than a weekend goal.
Common Speed Mission Mistakes and Timing Drills
Every crew that stalls below their target tier is leaking seconds in one of three recognizable patterns, and each one has a dedicated drill that fixes it without requiring a perfect run. The three patterns are slow handwheel rotation on elevation changes, delayed shell type selection during mixed-requirement phases, and over-correction on wind adjustments that wastes precious seconds recalculating.
| Mistake | Time Lost | Drill to Fix It |
|---|---|---|
| Re-reading the briefing card mid-loop | 4–8 sec | Cover card after first read; never look back |
| Calculator dials reset between parameters | 3–5 sec | Solve in fixed entry order every single engagement |
| Wrong shell grabbed from tray | 5–7 sec | Pre-stage tray to recommended family only |
| Over-charging past recommended ceiling | 2–4 sec | Default to one charge lower than calculator optimum |
| Second correction shot on long range | 6–10 sec | Pre-plot elevation before powder charge selection |
| Pausing to watch spot marker result | 1–2 sec | Reset to telegraph immediately after recoil |
The last habit is the easiest to fix and the most rewarding, because the Spot Marker result window is cosmetic during a speed run and stopping to admire it adds pure dead time to your total. Reset to the telegraph the instant the barrel settles, accept the multiplier on the next engagement, and trust the scoring system to credit you.
A useful weekly drill is to run three consecutive Bronze missions on the same region without checking the clock between them, then add the running totals and compare against the per-phase breakdown above. If your phase totals track the Silver column you are ready to push into Silver tier; if they track Gold you are one loading-motion drill away from a leaderboard push. The point of speed missions is not to memorize a single golden run, but to compress the loop until every phase is faster than your old Bronze best.
Frequently Asked Questions
What counts as a completed speed fire mission?
A run counts as completed once the teleprinter issues the final acknowledgment card after the last engagement, and the final score is the sum of all per-engagement multipliers minus any miss penalties. Quitting mid-run forfeits the score and does not register on the leaderboard.
Does the Iron Nest speed challenge use the same shell types as the campaign?
Yes. The speed mission briefing pins you to a recommended shell family—usually Armor-Piercing for hard targets or high-explosive for area fire—but the underlying shell catalog is identical to the one used in the campaign regions. Pre-staging the tray to the briefing's family is the single biggest loading-time optimization available.
How is fire mission timing measured across regions?
The in-game timer is wall-clock seconds from the first telegraph chirp to the final acknowledgment card, which means any pause the player takes counts against the run. External timing tools are not used for the official leaderboards, so optimizing for clean in-game motion is more valuable than any scripted macro could be.
Can a solo operator reach Ace tier without a crew?
Yes, although the Ace tier is far easier with a dedicated loader who pre-stages shells and reads the briefing aloud. Solo operators can reach Ace by grinding the regional leaderboards until the loading motion is automatic, but they should expect a longer learning curve than a coordinated crew.
What is the biggest time leak for new speed mission crews?
The single largest leak for new crews is over-charging past the recommended powder charge, because the extra elevation handwheel travel almost always costs more seconds than it saves in corrections. Defaulting to one charge lower than the calculator optimum and trusting the Spot Marker multiplier is the fastest path out of Bronze tier.