Coordinate Grid Axes and Reference Points in Iron Nest
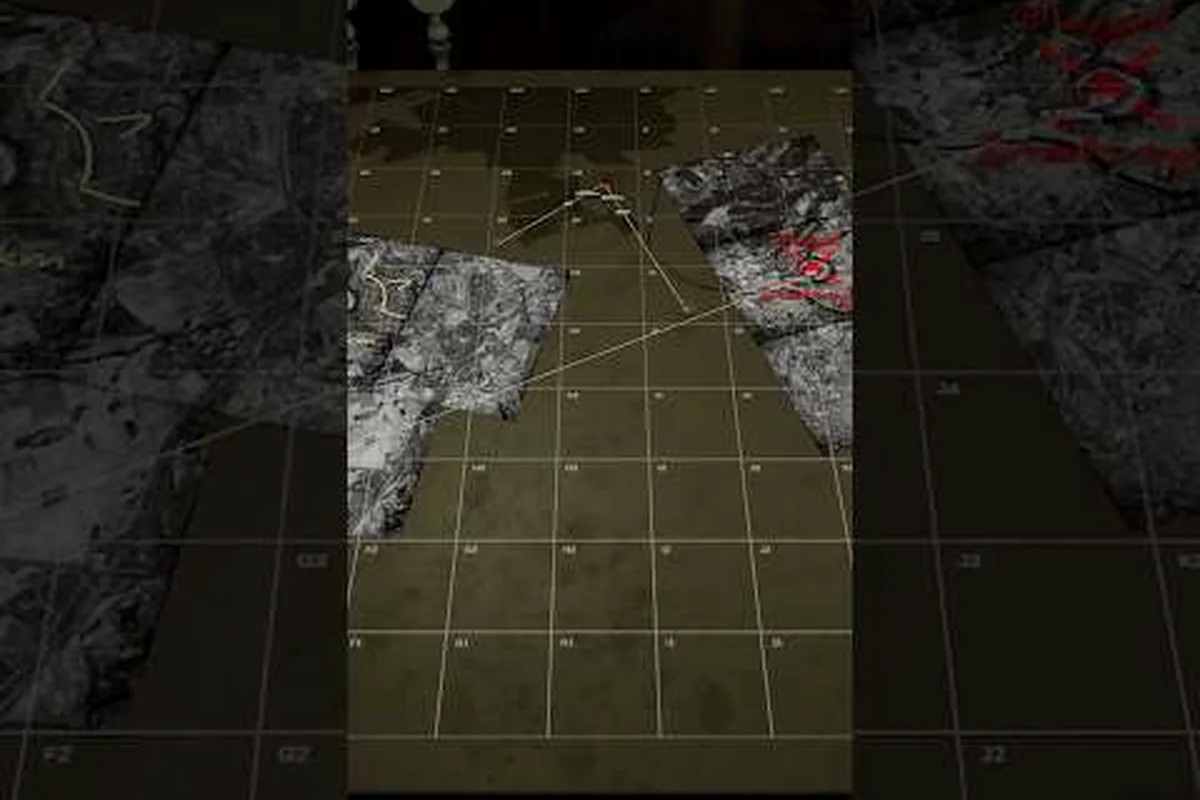
Every successful round in the game begins long before you touch the ballistic calculator. The player serving as spotter leans over the tactical map, listens to high command chatter on the teleprinter, and converts whispered observations into clean grid references that the gunner can actually use. That conversion is the coordinate system, and it sits at the very center of the game's diesel-punk artillery loop.
-
Pencil tools allow color-coded annotations on the map surface
-
Iris tool previews range circles for estimated target distance
-
Map provenance reveals whether data comes from Directorate or partisan sources
-
Coordinate plotting speed directly affects challenge mode scores
-
Common errors include transposed digits and misread bearing angles
-
Persistent intel layers allow tracking multiple targets across turns
-
The grid uses military coordinate notation with letter-number pairs
-
The alphanumeric coordinate format reads column-letter first then row-number, following standard military grid reference convention
-
Sub-grid quadrant notation adds NW, NE, SW, or SE to the base coordinate for 250-meter precision targeting
-
Cross-bearing triangulation from two spotters reduces coordinate uncertainty to approximately ±5 meters at any range
Unlike arcade shooters where aiming is automatic, the game asks you to think like a real forward observer. A target report arrives as raw intel — a bearing, a distance estimate, a landmark — and the spotter rewrites it into a standardized format on the map table. Once that number goes into the firing card, the ballistic calculator can chew through the math. Skip the coordinate step and the whole chain falls apart, because the calculator is only as accurate as the grid square you feed it.
The Iron Nest grid itself is built on a simple philosophy borrowed from real military map reading: a flat 2D plane divided into equal squares, each tagged with a letter-number pair. Because every map table uses the same scale and orientation, two different crews working the same fire mission will plot identical coordinates even if they have never met. This shared language is what allows spotters, gunners, and high command to communicate without confusion under pressure.
| Term | What It Represents | When You Use It |
|---|---|---|
| Bearing | Horizontal direction from turret to target | Reporting a target's compass angle |
| Elevation | Vertical barrel angle above horizon | Adjusting for distance and terrain |
| Grid Reference | Letter-number tag on the Iron Nest grid | Plotting a precise location on the map |
| Range | Distance in meters between turret and target | Picking the right powder charge |
If you are new to the genre, spend at least one full session just plotting coordinates without firing. Build the muscle memory first, and the combat scenarios become dramatically easier once you step behind the calculator. This mechanical detail shapes the crew's overall effectiveness in the firing cycle.
Reading the Iron Nest Grid Layout
The first thing to understand about the Iron Nest grid is that it is not arbitrary. Map designers laid it out so that each square covers roughly the same ground area at the playable scale, which means a grid reference in one corner of the table carries the same meaning as one in the opposite corner. Consistency is the entire reason the coordinate system works.
Map Table Zones and Orientation
The physical map table is divided into logical zones so spotters can orient themselves at a glance. The turret always sits at a fixed anchor point, usually marked with a small turret icon and a crosshair, and every other square radiates outward from that anchor. North is locked to the top of the table in the default orientation, which matches the bearing dial on your ballistic calculator — a small but critical detail that prevents 90-degree errors during high-pressure missions.
| Zone | Location on Map | Typical Use |
|---|---|---|
| Anchor Square | Center of map | Turret position, origin of all bearings |
| Forward Zone | North of anchor | Primary engagement area |
| Flank Zones | East and west of anchor | Anti-vehicle ambush angles |
| Rear Zone | South of anchor | Restricted fire, friendly territory |
Some scenarios rotate the map 90 or 180 degrees to simulate a repositioned turret, but the grid lettering stays the same. When that happens, the bearing numbers shift but the grid references do not — your B-7 always points to the same physical spot on the ground regardless of which way the map is facing.
Grid Lettering and Numbering Convention
Iron Nest grid squares are tagged with a single capital letter followed by a one- or two-digit number, such as D-4 or K-12. Letters run along the horizontal axis and numbers run along the vertical axis, similar to chess notation. When you read a reference out loud, players typically say "Delta Four" or "Kilo Twelve" using the NATO phonetic alphabet so the gunner never confuses similar-sounding letters.
Two-digit numbers exist for larger maps where single digits would create duplicate references. If you are reporting a target, always state the full grid square including the letter, because saying "Twelve" alone is meaningless on a grid that has both D-12 and K-12. Precision in your speech is what keeps the firing card accurate.
Plotting Coordinates with the Map Table
Plotting is where the coordinate system stops being theory and becomes a hands-on skill. A clean plot requires a steady hand, a sharp eye, and a workflow you can run without thinking once the fire mission heats up. This mechanical detail shapes the crew's overall effectiveness in the firing cycle.
Translating Spotted Coordinates
When a forward observer radios in a contact, the report usually includes a landmark, a rough bearing, and a distance estimate. Your job is to translate that fuzzy intel into a hard grid square. Start by finding the landmark on the tactical map, then swing your bearing line from the turret anchor until it matches the reported direction. Drop a perpendicular at the stated range and read off the grid square.
| Step | Action | Common Mistake |
|---|---|---|
| 1 | Identify the reported landmark | Misreading a road as a ridge |
| 2 | Draw the bearing line from anchor | Forgetting to recenter the protractor |
| 3 | Mark the estimated range | Off by one grid square |
| 4 | Read the intersecting grid square | Skipping the letter, citing only the number |
| 5 | Verify with second landmark | Skipping verification entirely |
Step five is the one most beginners skip, and it is the step that separates acceptable spotters from great ones. A second landmark cross-check catches errors before the gunner wastes a powder charge on a wrong target. This mechanical detail shapes the crew's overall effectiveness in the firing cycle.
Adjusting for Charge and Range
Once you have a clean grid reference, the ballistic calculator takes over, but it still needs you to choose the right powder charge (charges 1 through 6 cover short to long ranges). The grid reference defines where, and the powder charge defines how. Plot the coordinate, read the approximate distance to the square, dial in the matching charge, and the calculator will return a firing card with elevation and bearing adjustments.
If your first shot lands long or short, do not re-plot the coordinate from scratch. Instead, nudge the elevation by the recommended correction step on the firing card while keeping the same grid reference. Re-plotting wastes time, and in the game's timed missions, that delay often means the target has moved by the time you reload. For a deeper walkthrough of how the map and the calculator connect, see our broader Iron Nest tactical map overview.
Triangulation and Spotter Coordination
One spotter with one landmark is enough for a rough engagement, but two spotters with two landmarks produce a precise fix. Triangulation is the technique of plotting two independent bearing lines and reading off the grid square where they cross. It is the gold standard of the Iron Nest grid workflow because two angles almost never lie about the same point.
Coordinate Triangulation Using Two Spotters
When high command sends a fire mission that requires triangulation, the teleprinter will request two independent spotter reports. Each spotter picks a different landmark, draws a separate bearing line, and the intersection becomes the target square. Because each spotter's bearing is independent, small errors in one report cancel against the second, which is why triangulation dramatically reduces coordinate drift over long distances.
If you want to drill this technique, the spotter guide section of our tactical map guide walks through the same workflow using in-game screenshots. Practicing with screenshots is faster than live missions and lets you reset the grid as many times as you want.
When Spotters Disagree
Sometimes the two bearing lines do not cross cleanly. They might form a narrow triangle, which means at least one spotter misread their landmark. The correct response is to call for a third spotter rather than guess, because the third line will usually break the tie cleanly. Never average the two wrong plots into a "good enough" coordinate — the ballistic calculator cannot distinguish an averaged guess from a clean fix, and your shot will land somewhere between the two wrong spots, hitting nothing useful.
Coordinate Drills: Sharpening Your Plotting Speed
Reading a coordinate off the map is a perishable skill. Without practice, even experienced players start misreading single letters and dropping digits under pressure. The drills below are designed to keep your plotting reflexes sharp between full fire missions. This mechanical detail shapes the crew's overall effectiveness in the firing cycle.
Beginner Coordinate Drills
Start with single-square identification. Have a friend call out "Bravo Seven" while you race to find the square on the map table and call back the landmark it covers. Once you can identify squares in under three seconds, add bearing drills: the caller shouts a landmark, and you must report both the grid reference and the bearing. These two drills form the foundation of every other tactical move in the game, and they translate directly to combat performance.
A second beginner drill is the reverse lookup: you find an empty square, and your friend has to identify it by landmark alone. This trains the spatial memory that real forward observers rely on when the radio crackles and they have only seconds to respond.
Advanced Plotting Challenges
Once the basics feel automatic, run timed missions where high command sends six to ten fire missions in rapid succession. Plot, transmit, fire, repeat. Track how many of your first-round hits land within the inner scoring ring of the target zone — that metric reflects your true coordinate accuracy, not your gunner's skill. Anything below 70 percent means the coordinate step is leaking accuracy, and you need to slow down and re-verify landmarks.
Another advanced drill is plotting under rotation. Some scenarios spin the map 180 degrees to simulate a turret repositioning, which forces you to mentally flip the bearing numbers without losing the grid reference. Mastering this keeps you effective during long campaigns where the action shifts across the entire map.
If you want to deepen your toolkit, our grid reference guide covers the notation rules in even more detail, and the map tools breakdown explains every instrument sitting on the map table. Together with this coordinate system guide, those three references cover the complete plotting workflow from raw intel to firing card. Official mission data and updates are also available on the Iron Nest Steam page, which is the most reliable source for scenario-specific coordinate conventions.
Frequently Asked Questions
What is the basic coordinate format in the game?
The Iron Nest grid uses a letter-number pair such as D-4 or K-12, read using the NATO phonetic alphabet so similar-sounding letters never get confused on the radio. Map proficiency reduces the time from spotter report to first round downrange.
How accurate does a coordinate need to be for a hit?
For most fire missions a single grid square is accurate enough, but precision targets benefit from triangulation to within half a square — the ballistic calculator can resolve that level of detail once you feed it a clean reference. Map proficiency reduces the time from spotter report to first round downrange.
What is the difference between a bearing and a grid reference?
A bearing is a compass direction from the turret to the target, while a grid reference is the fixed letter-number tag of the actual target location on the map. Bearings rotate with the turret, but grid references stay locked to the terrain.
Can two spotters give different coordinates for the same target?
Yes, especially if one landmark is partially obscured. When reports disagree, the correct move is to call for a third spotter rather than average the two, because averaging a clean plot with a wrong plot still gives a wrong answer.
How do I practice plotting without wasting ammunition?
Use the free-play sandbox mode that lets you call coordinates without firing, and pair it with the drills in this guide. Sandbox repetition builds speed, and the drills build accuracy, which together make live fire missions feel much smoother once you return to real scenarios.